

Upcycle Cashmere Scarf Knitting Pattern

Sometimes the best knitted scarf doesn’t start with brand-new yarn — it starts with a story.
My friend’s sister had tucked away her favorite cashmere sweater in a closet for years. It was soft, cozy, and well-loved... but sadly, it had some small damage — the kind only moths know how to make. Hoping to save it, she asked her sister (also a knitter) if it could be fixed.
That’s when I got a call.
When I finally saw the sweater, I realized it was beyond repair — not just one hole, but many tiny ones scattered everywhere. It broke my heart to think this once-favorite sweater would just be thrown away.
But knitters are creative, stubborn souls, aren’t we?
Instead of tossing it, I carefully unseamed, unraveled, and rescued about 300 grams of beautiful brown cashmere yarn. I doubled the fine strands, gave them new strength, and decided to turn them into something that could be loved all over again — a scarf.
This easy scarf pattern uses simple stockinette stitch with ribbed cables running along both sides and finishing the ends. Clean, classic, and oh-so-soft — perfect for showing off special yarn, whether from a new skein or a treasured old sweater.
I worked this one on my knitting machine with hand-manipulated cables, but it’s suitable for hand knitting too. Any knitter with a little patience (and maybe a story of their own) can make it.
Because sometimes… the most beautiful knits come from second chances.
The Classic Bordered Cable Scarf
The "Border & Cable" ScarfInstructions (Lower Border, Main Body and Top Border)
Designed for Hand Knitting
Finished Measurements: Width: Approx. 10 inches (25 cm) Length: Approx. 70 inches (178 cm)
Gauge: 28 sts and 36 rows = 4 inches (10 cm) in stockinette stitch.
Materials
- Approx. 800-900 yards of Fingering weight yarn (or 200g reclaimed cashmere).
- US #3 (3.25mm) straight or circular knitting needles.
- Cable needle (cn).
- Tapestry needle.
Abbreviations
- K: Knit
- P: Purl
- RS: Right Side
- WS: Wrong Side
- C4R (Cable 4 Right): Slip next 2 sts onto cable needle and hold at back of work. Knit next 2 sts from left needle, then knit 2 sts from cable needle.
Cast on 69 sts.
This section creates a ribbed texture with cables across the entire width.
Row 1 (RS): *K4, P1; repeat from * to the last 4 sts, K4.
Row 2 (WS): P4, *K1, P4; repeat from * to end.
Row 3: Repeat Row 1.
Row 4: Repeat Row 2.
Row 5: Repeat Row 1.
Row 6: Repeat Row 2.
Row 7 (Cable Row): *C4R, P1; repeat from * to the last 4 sts, C4R.
Row 8: Repeat Row 2.
Row 9: Repeat Row 1.
Row 10: Repeat Row 2.
Row 11: Repeat Row 1.
Row 12: Repeat Row 2.
This section establishes the smooth center panel while keeping the cables on the edges.
Row 13 (RS - Setup): C4R, P1, Knit 59, P1, C4R.
Row 14 (WS): P4, K1, Purl 59, K1, P4.
Row 15: K4, P1, Knit 59, P1, K4.
Row 16: Repeat Row 14.
Row 17: Repeat Row 15.
Row 18: Repeat Row 14.
Row 19 (Cable Row): C4R, P1, Knit 59, P1, C4R.
Rows 20 – 24: Work straight in pattern (Repeat Rows 14, 15, 14, 15, 14).
Repeat Rows 19 – 24 until the scarf measures approximately 68 inches (or 2 inches less than your desired finished length), ending with a Row 24 (WS).
This section returns to the ribbed texture across the full width to match the start.
Row 1 (RS): *K4, P1; repeat from * to the last 4 sts, K4.
Row 2 (WS): P4, *K1, P4; repeat from * to end.
Row 3: Repeat Row 1.
Row 4: Repeat Row 2.
Row 5: Repeat Row 1.
Row 6: Repeat Row 2.
Row 7 (Cable Row): *C4R, P1; repeat from * to the last 4 sts, C4R.
Row 8: Repeat Row 2.
Row 9: Repeat Row 1.
Row 10: Repeat Row 2.
Row 11: Repeat Row 1.
Row 12: Repeat Row 2.
Finishing: Bind off all stitches knitwise on the Right Side. Weave in all ends. Block the scarf to smooth out the stockinette center and open up the cables.

You might like these
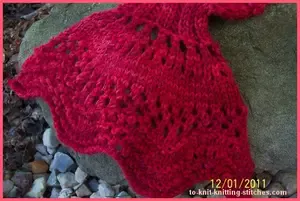
Feather and Fan Neck Scarf - Free Scarf Knitting Pattern
This Feather and Fan neck scarf is knitted with a 50 gram ball wool. Beautiful and make a great gift for your love one.
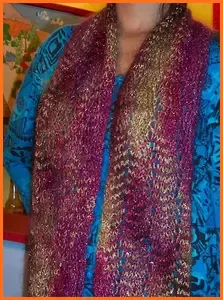
Lacy Zigzag Scarf - Easy To Knit And Beautiful Lace Scarf
Beautiful Lacy zigzag scarf free knitting pattern. This scarf knitted with luxurious Fiesta La Boheme in Starbust.
Free Scarf Knitting Patterns - Easy Scarf For Beginner
You can find easy and free scarf knitting patterns here. Many of them are designed by myself and many are from knitters around the web. Hope you enjoy them!


Recent Articles
-
pattern help, knitted rabbit!
May 31, 26 07:26 PM
This pattern for a toy rabbit ends previous row (back body) with 18 stitches, and instructs not to cut wool/leave on holder. This is the next instruction.


