

Shawlette with Leaf Edging Machine Knitting Pattern
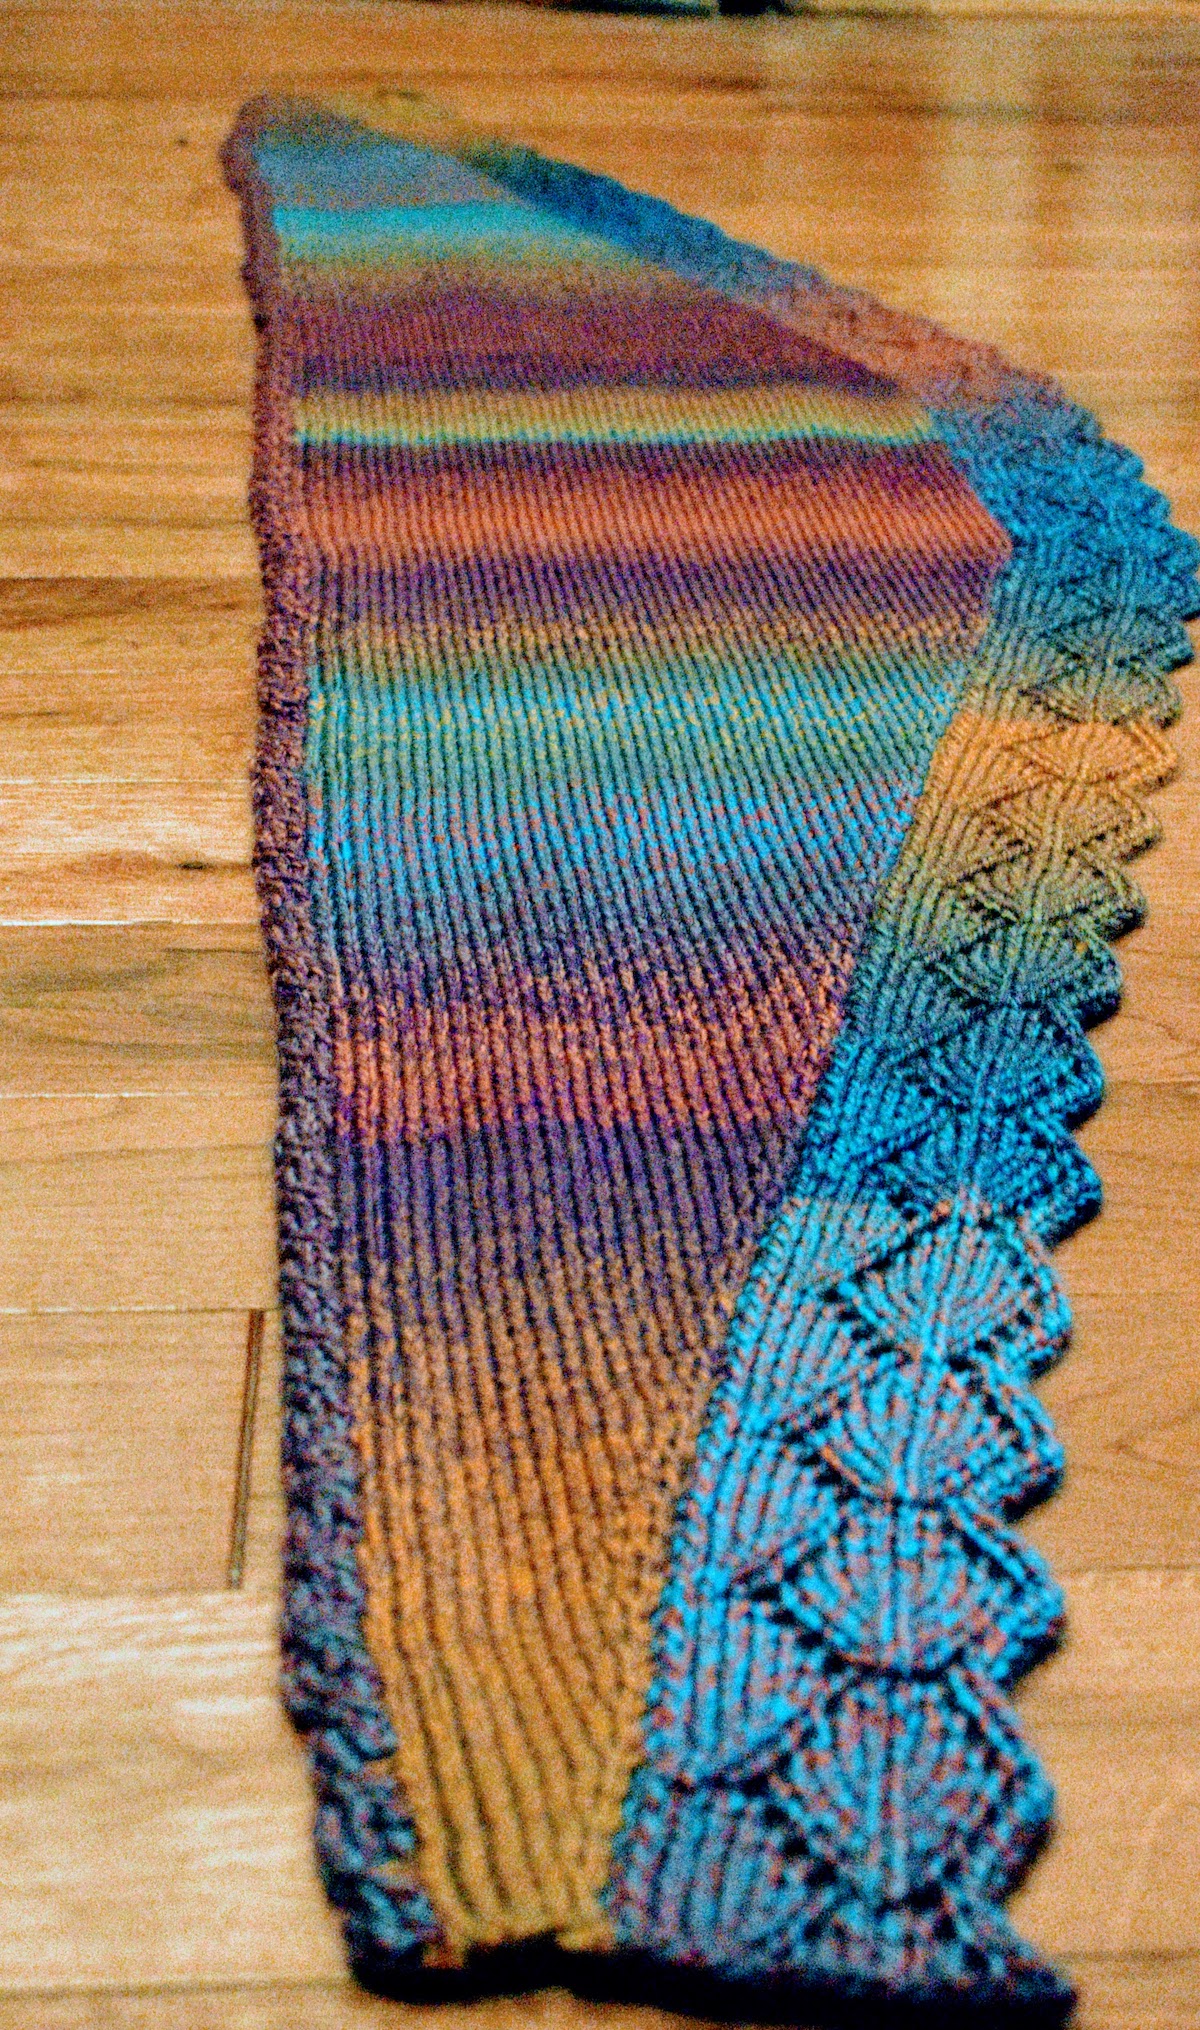
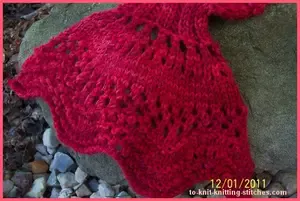
Fall brings fallen leaves everywhere. I enjoy looking at them but not as much when it comes to racking them. I’m still in the mood for leaves. This time I’ll add them to my knitting project. I had just the perfect yarn for it. I sketched out a plan of a shawlette, a long and skinny one. The one that is similar to a crescent shawl but not too curvy.
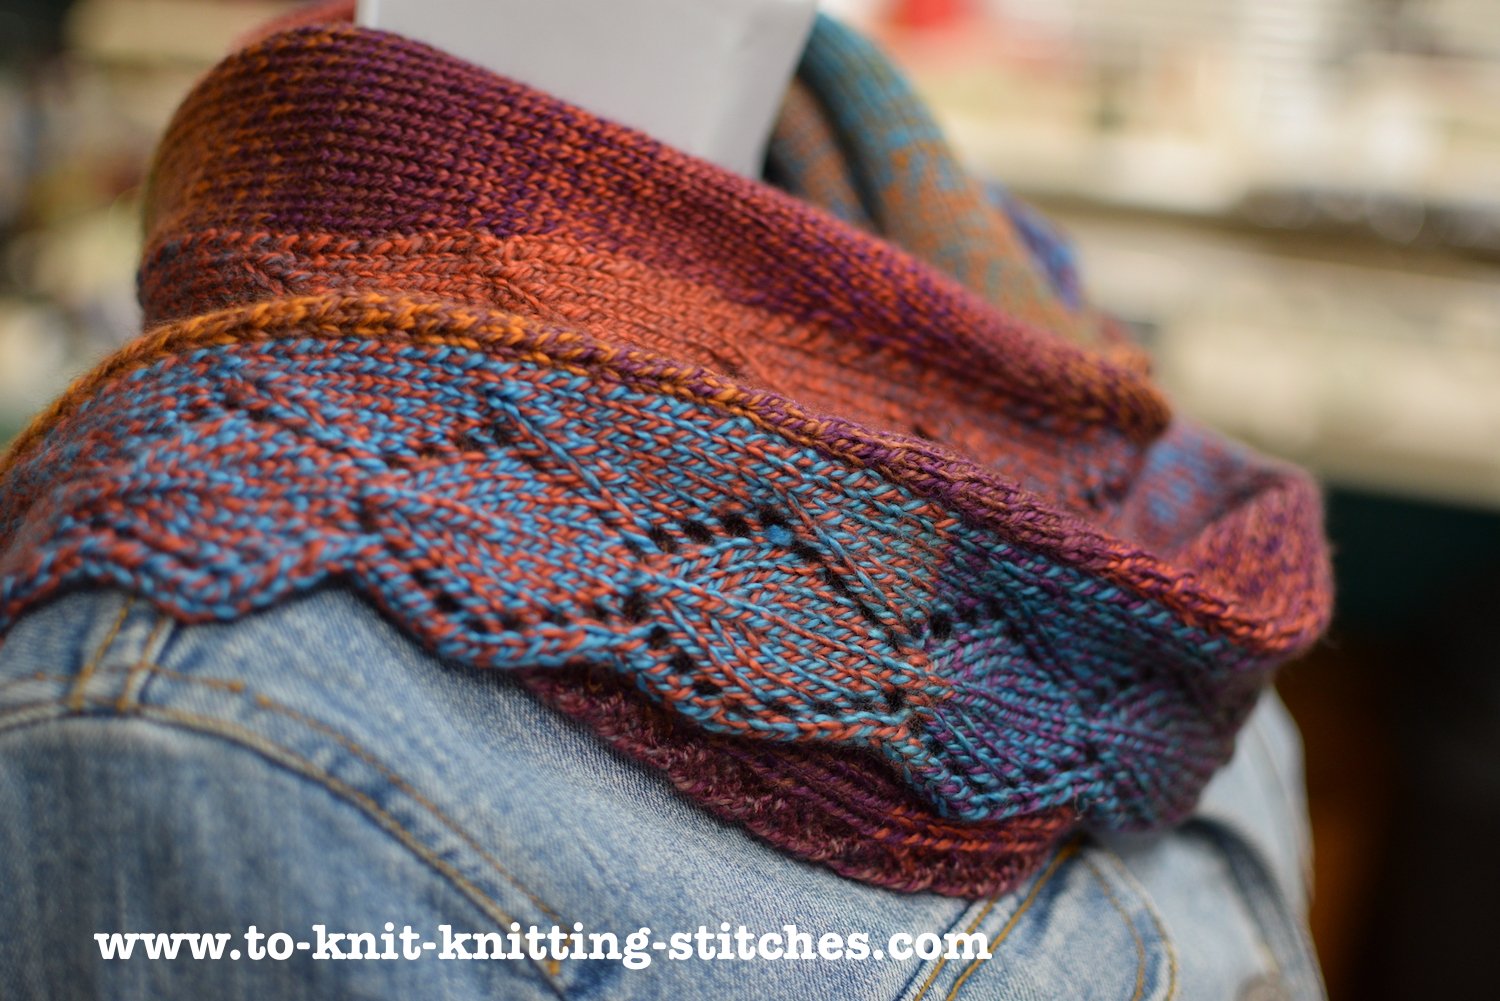
I knitted the shawlette in 3 parts. First I made the body, then the lower leaf edge which I joined to the shawlette body at the same time when I was making it. Lastly, the 4 st-cable border was added for the top edge. I could have made them all in one piece but there would be too many areas of concentration.
I didn’t block it but I steamed with my handheld steamer. It worked out really well for me. The hardest part for me is to figure out how to wear the shawlette. This can be a very challenging task for me.
Here is the pattern for the shawlette with a leaf edging. Alternatively, You can just knit a straight scarf and add leaf edging on both sides.
Gauge: 6 sts x 6 rows per inch
Shawlette size: 63 inches x 12 inches ( at the widest part)
Let's Get to the Shawlette Pattern
Materials
1. 2 balls (3.5 oz each) of DK or light worsted yarn that is similar to my yarn gauge. I used a yarn called “Caterina Aztec Blanket” by YarnBee. It’s 295 yd/3.5 oz per ball. I used about a ball and a half for the shawlette.
2. A Single bed knitting machine
3. Transfer prongs
4. Craw weights
Direction
Machine setting - T# 8
Bring forward 7 needles on the right side of the machine and cast on using an e-wrap method. Set RC to 000. Begin working increases as follows and make sure to hang weights accordingly.
Increase 1 st at the right end only on every 4th row until you have 53 sts total (around row 182). Don’t worry too much if your row counter is not matching with mine. A row or two won’t make much difference.
Increase 1 st at the right end only on every 5th row until you have 60 sts total (around row 218).
Knit straight 80 rows without increasing (row 298).
Now work decrease as follows;
Decrease 1 st at the right end every 5th row until you have 53 sts left on the bed.
Then decrease 1 st at the right end every 4th row until you have 7 sts left on the bed.(row 508) Bind off and remove work from the bed.
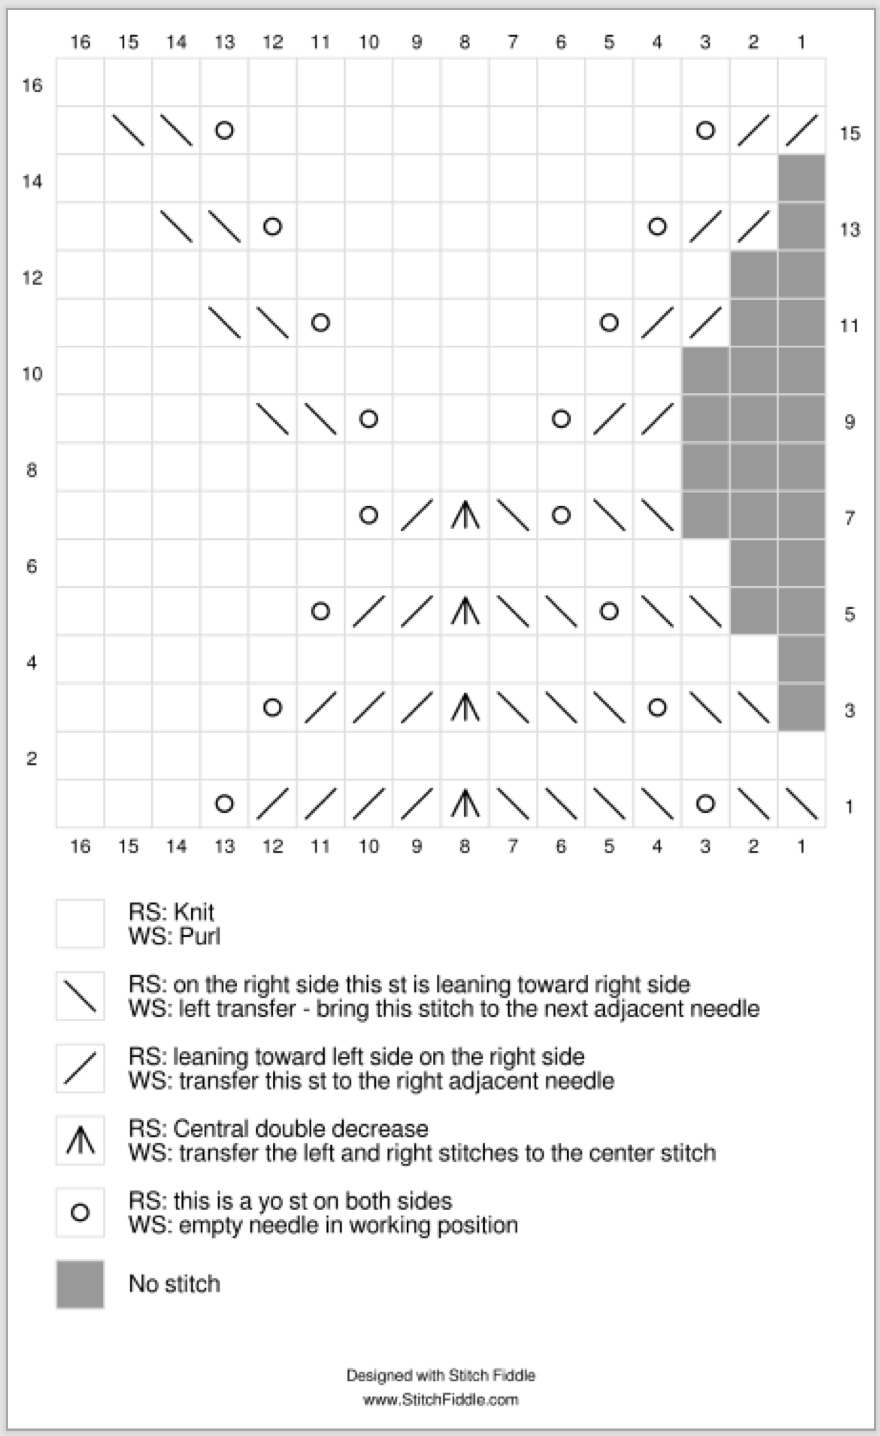
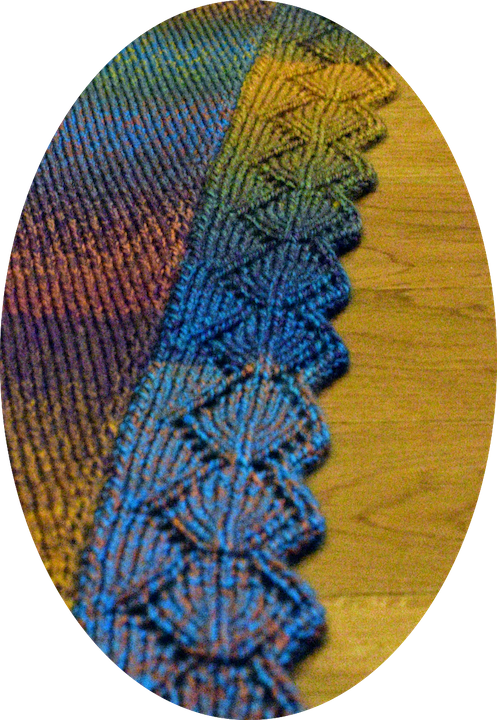
Leaf Edging Pattern (you can watch my video at the link below) Leaf Edging On a Knitting Machine Using Hand tools Manipulating
This is a seam as you go method.
Setting the Tension to #8 and carriage on the right. E wrap 16 sts starting from left to right. Don’t knit yet. Grab a shawlette body with the wrong side facing you and hang a right edge stitch of the cast-on row on the end needle on the left. Knit 2 rows.
Follow the left Edging chart below and continue attaching the right-side stitches of the shawlette body every other row until the end of the shawlette body. Bind off all stitches when complete.
You can add any type of border you want for the other side of the shawlette. I made 4st- cable using the seam as you go method. I crossed the cable every 6 rows. You can try crochet edging as well if you know how.
Block or steam the piece when finished.
Leaf Edge Pattern Chart
Video Tutorial for Leaf Edging
Back To Machine Knitting Patterns Page
Go to Scarf Knitting Patterns Page
Go to Knitting Instruction Home Page

You might like these
Feather and Fan Neck Scarf - Free Scarf Knitting Pattern
This Feather and Fan neck scarf is knitted with a 50 gram ball wool. Beautiful and make a great gift for your love one.
Lacy Zigzag Scarf - Easy To Knit And Beautiful Lace Scarf
Beautiful Lacy zigzag scarf free knitting pattern. This scarf knitted with luxurious Fiesta La Boheme in Starbust.
Free Scarf Knitting Patterns - Easy Scarf For Beginner
You can find easy and free scarf knitting patterns here. Many of them are designed by myself and many are from knitters around the web. Hope you enjoy them!


Recent Articles
-
increasing in sleeve
Apr 11, 26 01:00 AM
the pattern says: inc 1 st at each end of foll 8TH ROW TILL 66 STS. cont in pattern till work measures 26cm. I have tried this 3 times and it does not


