

Cute Baby and Child Pumpkin Hat Knitting Pattern Using Straight Needles (also works for circular)

Get a printable pattern of this pumpkin hat at Google Docs Here; Cute Baby And Child Hat
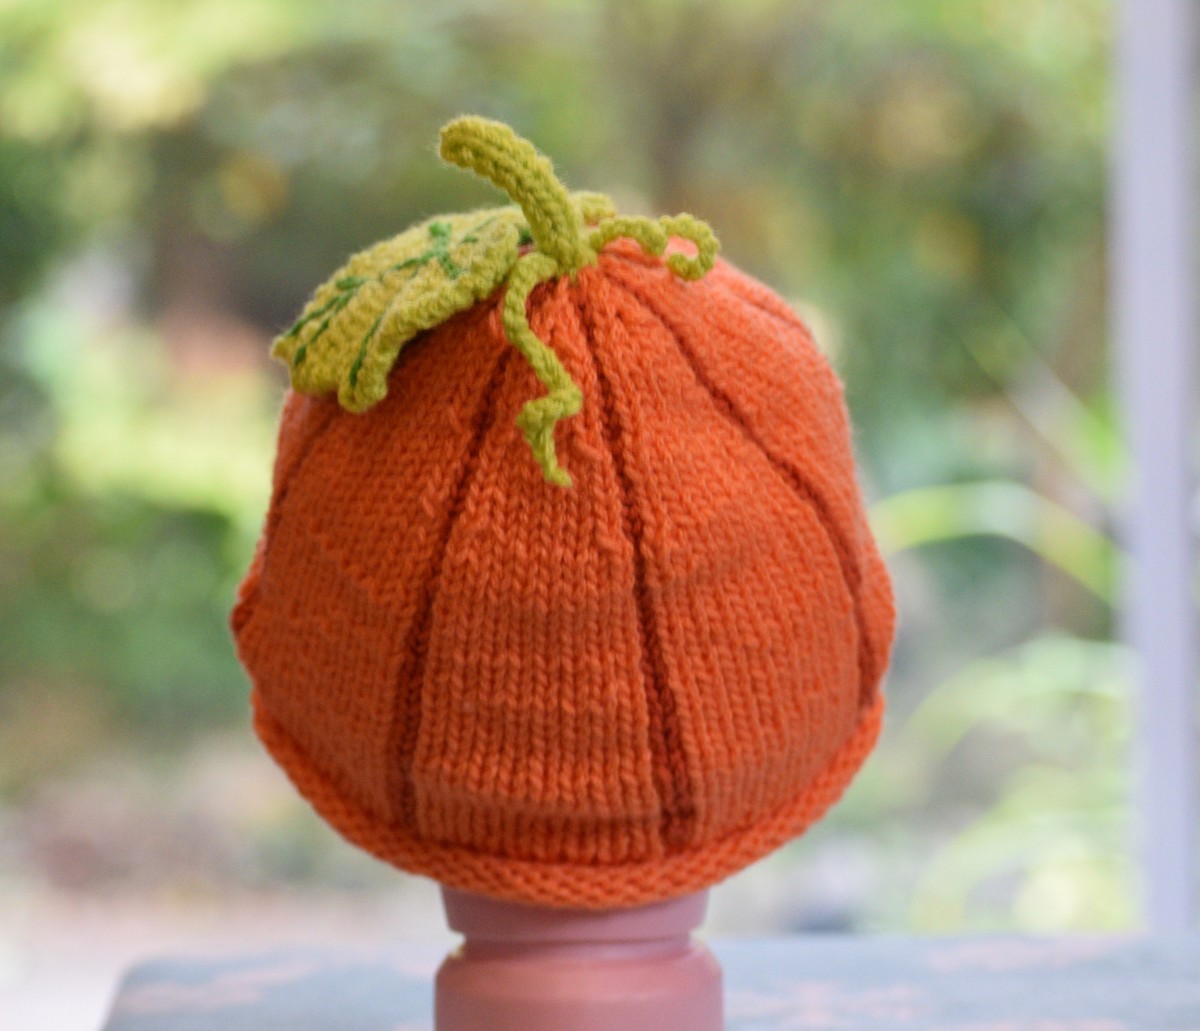
It just turned into Fall a few days ago and I can’t wait to bake some pumpkin pie! I’m going to celebrate this fun season with a bright and colorful pumpkin hat. There are 2 sizes you can choose. A small size will fit a newborn to a year old and the bigger side will fit a year old child up to 2 or 3 years of age. If you need to make it bigger, you can add a multiple of 9 stitches.
Gauge: 4.5 sts / inch using number 8 us (5mm) needle
Here’s what you need for this pumpkin hat project;
- 1 ball (75g) of Modern baby yarn by Lion Brand in orange or yarn with similar gauge
- Small amount of worsted yarns in light and dark green for the leaf, stem and tendrils. Light brown for the ribs of the pumpkin.
- knitting needle #7 (4.5) and #8 (5mm)
- Big eye needle
- Crochet hook size H
- Stitch holder
Direction For The Pumpkin Hat
CO 54 (63) sts using smaller needles. Work in stockinette stitch for 10 rows ending with a purl row. This is the rolled edge and it will roll. Change to the bigger needles and follow the pattern below;
Row 1 (right side): *k8, p1; repeat to end of row.
Row 2: knit the knit sts and purl the purl st.
Repeat row 1 and 2 until 3.5 (4.5) inches long (measuring from the beginning of the rolled edge).
Now begin decrease as follow;
Crown Decrease
Row 1(right side): *skp (slip 1, k1, psso), k4, k2tog, p1; repeat from * to end of row.
Row 2- 6: knit the knit sts and purl the purl sts.
Row 7: *skp, k2, k2tog, p1; repeat from * to end of row.
Row 8-12: knit the knit sts and purl the purl sts.
Row 13: *skp, k2tog, p1; repeat from * to end of row.
Row 14: knit the knit sts and purl the purl sts.
Row 15: *k2tog, p1; repeat from to end of row.
Cut yarn leaving a 16 inches tail and transfer the remaining sts on to a stitch holder.
On the right side of the fabric, Make a slip stitch in every row of the purl st sections using a light brown yarn and a crochet hook. This to help highlight the ridges (ribs) of the pumpkin ( see photo or a link to a video on how to add slip stitches below). I started at the end of the rolled edge and made my way to the tip of the hat. When you reach the stitch holder, cut the yarn and pull it through that last loop to secure it.
A Video Showing How I Did My Slip Stitches With A Crochet Hook
Here is a link to the video; https://youtu.be/9ljCqHRTwKQ
In the video, I mentioned making slip sts between 2 ribs because the previous try-out hat I made has 2 purl sts but i didn’t like the look so much. So I decided to do one purl in the final hat instead. The technique remains the same.
Note: Do the slip sts on the left edge after the sides are seamed together. This will help cover up the side seam nicely.
Now make sure all the tails from the slip sts are placed at the back of work. Thread the big eye needle with a tail of orange yarn that you cut off earlier. Run the needle through all sts from stitch holder for 2 rounds. Then place right sides of the edges together and start seaming the edges together all the way to the cast on. Make sure it’s nice and secure before cutting off the yarn. Now you can go back and weave those tails from the brown yarn behind other sts.
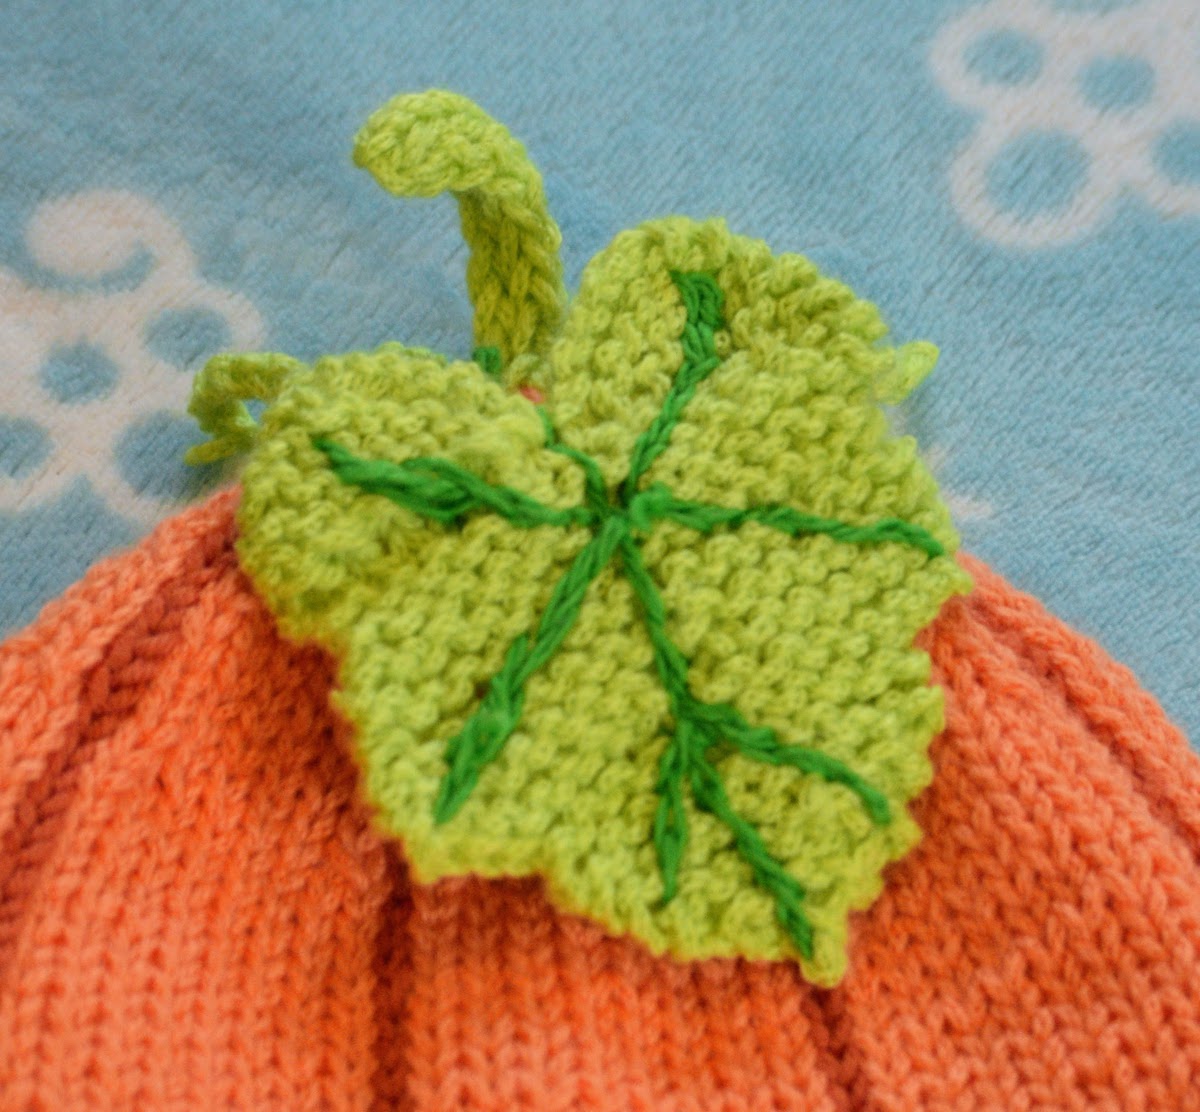
Stems Tendrils (little curl things) And Leaf
For Stems and Tendrils
CO 4 sts using smaller needles. Knit in stockinette st, make sure to slip the first stitch until desired length. Cast off. Leave a bit of tail for sewing a stem on a hat. Attach the stem by sewing it on the tip of the hat using the big eye needle. Sew a few stitches around the stem. Cut and hide all ends inside the hat.
Leaf Pattern
The lower part of the leaf
CO 14 sts using smaller needle.
Row 1: K7, turn
Row 2: Slip 1, K to end.
Row 3: K6, turn.
Row 4: Sl 1, k to end.
Row 5: K5, turn.
Row 6: Sl 1, k to end.
Row 7: K4, turn.
Row 8: Sl 1, k to end.
Row 9: K3, turn.
Row 10: Sl 1, k to end.
Row 11: K2, turn.
Row 12: Sl 1, k to end .
Row 13: K all 14 sts.
Repeat row 1-13 once.
Middle and top part of the leaf
Row 1: k2tog, k to last 2 sts, k2tog.
Row 2: Knit.
Row 3: Knit
Row 4: K1, M1, k to last 2 sts, M 1, k1.
Row 5 - 7: Knit
Row 8: K1, M1, k to last 2 sts, M 1, k1.
Row 9: K 8, turn.
Row 10; Sl 1, k to end.
Row 11: BO 3 sts, k to end.
Row 12: K 8, turn.
Row 13: Sl 1, k to end.
Row 14: BO 3 sts, k to end.
Row 15 - 18: Knit.
Row 19: K1, k2tog, kto last 2 sts, k2tog.
Row 20-21: Knit.
Row 22: K1, k2tog, k2, k2tog, k1.
Row 23: K1, k2tog, k2tog, k1.
Row 24: K2tog twice.
Row 25: k2 tog. End off.
Use a dark green yarn to create small lines on the leaf. You can do slip stitches with a crochet hook or embroider it with the big eye needle. Try position the lines as shown in the picture below. Attach the leaf to the hat near the stem. If you want to make small spiral things (I just found out that they’re called “tendrils”) as well, then you can just do chain sts with a crochet hook. Make each one at about 3-4 inches long and then twist them it into spiral with your fingers. Then attach them at the base of the stem. I think that pretty much it. Hope you have fun making this pumpkin hat. Enjoy!
Hope I don't leave anything else. If you find any mistake, please give me a shout. Thanks!
Get a printable pattern of this pumpkin hat at Google Docs Here; Cute Baby And Child Hat
You Might like....
Explore More Free Patterns at Knitting Instruction Home Page
Back to top of page

You might like these
Striped Baby Cocoon With A Matching Hat
Free Baby Cocoon and Hat Knitting Patterns. These adorable matching set of a cocoon and a hat are to fit newborns and up to 3-6 mon-old infant.
Super Cute Baby Hat in Rib Pattern With A Pom Pom
This baby hat with pom pom is very quick to knit. It fits a new born and up to one year or more. The rib pattern makes a hat super stretchy and soft. Make a great gift!
Super Easy & Super Cute Child Hat Knitting Pattern
Easy and cute to knit child hat knitting pattern. Make this hat using worsted weight yarn and 5.5mm needle. Choose yarn you like or suggested in the pattern!


Recent Articles
-
increasing in sleeve
Apr 11, 26 01:00 AM
the pattern says: inc 1 st at each end of foll 8TH ROW TILL 66 STS. cont in pattern till work measures 26cm. I have tried this 3 times and it does not


