

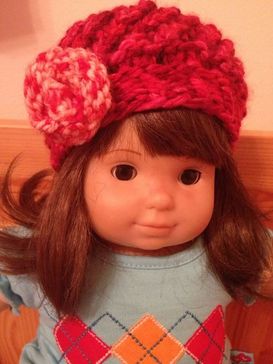
Strawberry Twirl Hat With A Matching Hat For American Girl Bitty Baby
Description: A girly hat in simple eyelet pattern knitted in bulky yarn. The color reminds me of strawberry, so that how the name came about. The pattern creates little columns of stitches that lean toward the right. If I were to keep knitting them, they will turn into spiral columns.
Skill Level: Easy
Finish size: small, medium and large (16, 18, 20 inches ) in circumference. The one in the photo is 18” and it fits my 6 years-old daughter.
Gauge: 3 sts per inch on needle # 9 (5.5mm) in 1x1 mistake ribbing

Materials:
1. 100g of Chunky weight yarn (I used Serenity Chunky Weight Debrah Norville Collection by Premier Yarn in Berry Burst) Need 2 balls to complete a girl hat and a doll hat.
2. 16 inch-Circular Knitting Needle size US # 9 (5.5 mm)
3. 20 inch Circular knitting needle size US # 11 (8mm)
4. A set of double pointed needle size US # 11 (8mm)
5. A Tapestry Needle
6. 10 Stitch markers (if you're experienced knitter, you probably only need one just to mark the beginning or the round. For beginner knitters, use markers when forming the crown or decreasing).
Direction For the Strawberry Twirl Hat
With circular needle #9, CO 48 (54, 60) sts. Place marker and joint yarn in round. Work in 1x1 mistake ribbing as follows;
1x1 Mistake Ribbing
Rnd 1: *k1 through the back loop, p1; repeat from * to end. Place marker at the beginning of rnd.
Repeat round 1 until piece measures approximately 1.5 inches.
Next rnd: Purl.
Increasing
Change to larger circular needle and work increase as follows;
Rnd 1: *K 2, yo; repeat from * to end of rnd.
Rnd 2: K2tog 0 (1, 0) time, K to end. You should have 72 (80, 90) sts.
Rnd 3: *Wyif (with yarn in front of work), K2tog; repeat from * to end of rnd.
Rnd 4: Knit.
Repeat rnd 3 and 4 until piece measure 4.5 (5, 6) inches ending with rnd 4.
Hat Crown Decreasing
Change to dpn (double pointed needle) when appropriate.
Rnd 1: *K 6 (6, 7), k2tog, place marker; rep from * to end of round.
Rnd 2: Knit.
Rnd 3: *K to 2 sts before marker, K2tog, slip marker; rep from * to end of rnd.
Repeat rnd 2 and 3 once (twice, twice) more.
Then repeat rnd 3, until there is only 1 sts left between each marker.
Next rnd: Remove markers as you knit. *k2tog; rep from * to end.
Cut yarn leaving 10 inches long tail and thread it through a tapestry needle. Weave the tail through all sts and secure tight. Cut all loose yarn and weave in all ends.
Attach a rose or a flower where appropriate (see rose pattern below).
Hat For American Girl Doll
Using the same yarn and dpn #11, CO 32 sts. Place marker and join yarn.
Work 1x1 mistake stitch rib for 1 inch. Purl 1 rnd.
Increasing rnd:
Rnd 1: *K 2, yo; rep to end. (48 sts)
Rnd 2: Knit.
Rnd 3: *With yarn in front of work, K2tog; rep from * to end.
Repeat rnd 2 and 3 until piece measures about 2.5 inches. Ending with rnd 2.
Crown Shaping (Decreasing)
Rnd 1: *K 6, k2tog, place marker; repeat from * to end of rnd.
Rnd 2: Knit.
Repeat rnd 1 until there's only 1 sts left between each marker.
Next rnd: *K2tog; rep from * to end. Cut yarn leaving 10-inches tail. Use tapestry needle to thread the yarn through those sts and secure them tight. Attach a rose where appropriate.
You can use the same pattern of the rose as below for the AG doll hat but make it a little shorter and using smaller needle.
Rose Knitting Pattern
Flower (rose) Accent (Optional)
Use left over worsted weight yarn in the same or different color scheme to make a flower for the hat. Or you can make any flower of your choice. It can be knit or crochet.
Here is a pattern for the rose I used for this strawberry twirl hat.
Materials
1. Worsted weight yarn of your choice
2. Knitting size 8 or 9 needle
3. Tapestry needle
Cast on 58 sts.
Row 1: Knit.
Row 2: Purl.
Row 3: Knit.
Row 4: Purl.
Row 5: [k 5, twist left] 2 times, [k7, twist left] 3 times, [k9, twist left] 2 times, K to end.
Row 6: Purl.
Row 7: *k2tog; rep from * to end.
Row 8: Bind off all sts. Cut yarn leaving 12 inches tail.
With your work right side up, slowly roll one end (the one with the tail) toward the other end to form a rose. Then use tapestry needle to sew the back end together. After finish sewing, I like to run the needle and thread through the center and at the beginning of the first pedal for couple times. This to help bringing the center down a little bit. I think it looks better this way. However you want to form your rose, it is up to you.
Knitting Terms and Abbreviation
k2tog = knit 2 sts together
Twist left = hold left needle and work piece with left hand and rotate them downward bringing them to a full circle and back to the normal working position.
Rnd = round
Rep = repeat
Step-By-Step Rose Making Picture Guide
 Cast on 58 sts. and work in stockinette st for 4 rows. |
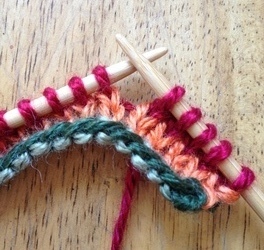
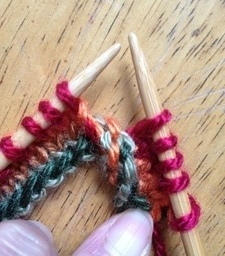
 The trick is on row 5 where the twisting takes place. Follow the pattern above and use this photo as reference. Rotate left needle along with working piece downward and toward back until complete round. |
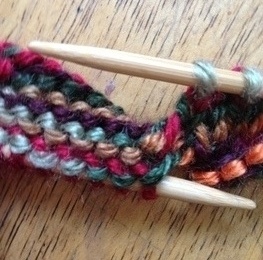
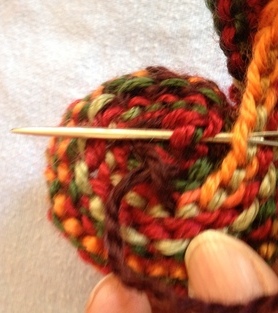
 Here we're back on the normal working position again. Notice the twisting of the work between the needles? That's what we want it to look like. |
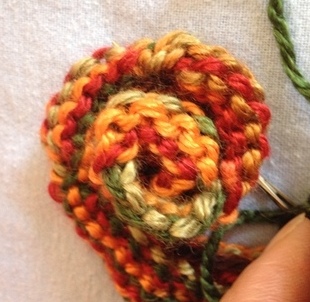 Shaping your work into a rose like so. I like to roll my rose with right side up. You're welcome to try the wrong side. You might like it better. |
 Sew back end together to form a rose. |
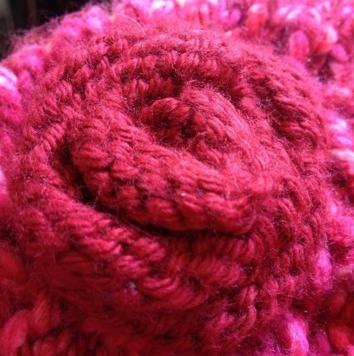
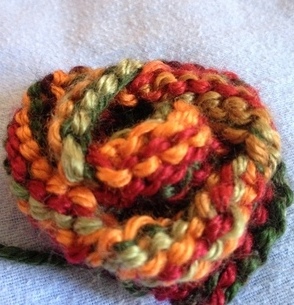 The finished result should look something like this, or perhaps prettier than this one. My roses all came out looking different every time! |
Go To Children Knitting Patterns
Leave Strawberry Twirl Hat To Knitting Instructions Home Page


Recent Articles
-
increasing in sleeve
Apr 11, 26 01:00 AM
the pattern says: inc 1 st at each end of foll 8TH ROW TILL 66 STS. cont in pattern till work measures 26cm. I have tried this 3 times and it does not


