

Free Quick and Easy Santa hat Knitting Pattern for Adults
Free Santa hat Knitting pattern by Ratchadawan Chambers
Want a quick Christmas knitting project? Here is one that you might enjoy making and finish it in a few days. How about making a Santa Hat! I have in my stash, some red worsted weight yarn and a skein of mohair. So, they are perfect for this Santa hat project.


The hat is knitted in circular fashion using double pointed needles. You can also knit in rows using straight needles as well, but you just need to seam the sides together. A Santa hat can’t be completed without a pom pom at the top. It’s your choice to buy one or make your own. Here is a link to my tutorial on how to make a pompom using a clover pom pom maker. How to Make a Pom Pom Using Clover Pom Pom Maker or see video below.
Here are supplies you’ll need to make this Santa Hat;
- A ball of worsted weight yarn in red
- A ball of white mohair or other fur yarn with the similar gauge
- A set of 5 double pointed needles in US # 9 (5.5mm) If you knit straight then get a pair of straight needles in the same size.
- Premade white pom pom or make your own.
- Big eye (tapestry) needle
- A stitch marker
Gauge: Red worsted yarn 4.5 st/6 rows/inch Mohair = 4st/6rows/inch
Direction for Making Santa Hat Using Double Pointed Needle (DPN) Needles
With a mohair yarn, cast on 19 sts on each of the 4 needles.
Join in a round and knit for 3” (18 rounds). Purl 1 round. Then knit for 3 more inches (total of 37 rounds). Purl 1 round.
Next round: Change to red yarn and knit for 3” then begin decrease as follows;
Round 1
Needle #1: Knit to the last 3 sts of the needle, k2tog, k1.
Needle #2: K1, sl 1, k1, psso, knit to the end of the needle.
Needle #3: Knit to the last 3 sts of the needle, k2tog, k1.
Needle #4: K1, Sl 1, k1, psso, knit to the end of the needle. Use a stitch marker to mark the end of the round here.
Round 2-4: knit.
Repeat rounds 1- 4 until you have 4 sts left. Cut yarn leaving a 6 inch tail. Use a big eye needle to thread the tail and run it through the last 4 sts. Pull it tight and weave the tail behind work.
Turn work inside out so that the wrong side is facing you. Fold the white brim along the purl sts row and sew it to the body of the hat along the first row of the red yarn. Attach a pom pom to the top and you’re done!
Knitting video tutorial on how to make
a pom pom
Santa hat Direction Using Straight Needle to Knit in Rows

With a mohair yarn, cast on 78 sts. Work in stockinette stitch (knit on the right side and purl on the wrong side) for 3” ending with a wrong side facing.
Next row (wrong side): Knit. Next row (right side): Knit.
Then work another 3” of stockinette sts. Ending with a wrong side row facing. Knit 1 row.
Next row (right side): Change to red yarn and knit for 3” then begin decrease as follows;
Place a marker between 39th and 40th sts. This marks the center of the hat.
Row 1(right side) : k2, sl 1, k1, psso, k to 3 sts before the marker, k2tog, k1, slip marker, k1, sl1,k1,psso, k to last 4 sts, k2tog, k2.
Row 2: Purl.
Row 3: Knit.
Row 4:Purl.
Repeat rows 1-4 until you have 6 sts left.
Cut yarn leaving a 20 inch tail. Use a big eye needle to thread the tail and run it through the last 4 sts. Pull it tight. Fold the piece in half vertically and with the right sides facing one another, sew both sides together using mattress stitches. (you can find tutorial on youtube if you need one) Use the white yarn to sew the white band.
Fold the white brim along the purl sts row and sew it to the hat body along the first row of the red yarn. Attach a pom pom to the top and you’re done!
You can share your finished Santa Hat if you'd like using a form below. I’d love to see it. Have fun making the hat!
Ratcha
Show Off Your Knitting Projects Here.
Proud of your knitting projects? Share your works here with us. Your knitting could be on the front page for picture of the month!
You might like these
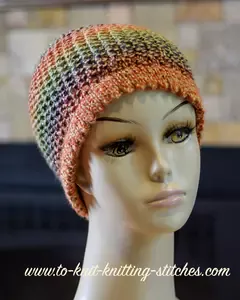
Awesome Autumn Beanie Hat Knitting Pattern Using Circular Needle
Here is a pattern for a cute beanie hat to share with my friends, knitters. Easy and fast to make.
Return to Knitting Instructions Home Page

You might like these
Awesome Autumn Beanie Hat Knitting Pattern Using Circular Needle
Here is a pattern for a cute beanie hat to share with my friends, knitters. Easy and fast to make.


Recent Articles
-
increasing in sleeve
Apr 11, 26 01:00 AM
the pattern says: inc 1 st at each end of foll 8TH ROW TILL 66 STS. cont in pattern till work measures 26cm. I have tried this 3 times and it does not


